Toolchain Setup
The framework you will be using to program the hardware is based on Zephyr, a lightweight open-source real-time operating system (RTOS). It is one of the most widely used open-source RTOS. You will use Zephyr for both assignments. This section will guide you through the Zephyr installation.
The documentation for setting up Zephyr can be found here. We recommend a quick read, even if you are installing it with the Linux script. Linux users can follow the steps in the For Linux users section. Windows and macOS users will have to go through the guide in the For Windows or macOS users section.
Here are a few things to keep in mind when setting up the toolchain. Should you diverge from these recommendations, the support you will receive from the TAs will be limited!
- This assignment has been tested on Windows, Linux (Ubuntu, Fedora and Arch), as well as on macOS Sonoma with Apple Silicon
- We highly recommend using a Linux distribution for these labs.
- While working with Zephyr (and especially on Windows), you might find problems that we haven't encountered. Feel free to ask the TAs for help during the labs; however, we encourage you to give it some tries first independently, keeping in mind that Zephyr enjoys extensive support online.
- Building and flashing takes much longer in Windows.
- Due to issues with executables, Zephyr does not support flashing the applications with WSL.
- For IDEs, we recommend CLion (preferred) or Visual Studio Code as those have been tested with these lab assignments. NOTE: Ensure there are no spaces in file/folder names you create
For Linux users:
-
Download
zephyr-install-ubuntu.zipif you are on Ubuntu orzephyr-install-fedora.zipif you are on Fedora. -
Extract the script inside the zip file. Ubuntu users should now have
zephyr-install-ubuntu.shand Fedora users should havezephyr-install-fedora.sh. -
Run the extraced script, by first opening a new terminal instance in the directory the extracted script is present in and then executing
chmod u+x zephyr-install-ubuntu.shfollowed by./zephyr-install-ubuntu.shif you are on Ubuntu, orchmod u+x zephyr-install-fedora.sh./zephyr-install-fedora.shif you are on Fedora.Note:
- You will be prompted several times during the installation - say "yes" to all.
- If you are on Ubuntu or Fedora the required packages will be installed for you. However, on other distributions you will need to manually install the dependencies mentioned in the installation script (this list is printed on the terminal when the script is run).
- Note that this will create two directories,
zephyrprojectandzephyr-sdk-*, in your home directory which will be required for Assignment A and Assignment B. You can edit the script and change the location of these directories if you want. - Note that this script uses commands from the Getting Started Guide from Zephyr. Essentially it runs all the required commands for you. Check this guide if you want to know in detail what the commands do on your computer.
-
Attach the development board via the USB-A to USB-mini cable.
-
Navigate to the Zephyr installation directory, using the command
cd ~/zephyrproject
- Then activate the virtual environment, using the command
source .venv/bin/activate
Remember to do this every time you are working with Zephyr
- Now compile and upload the blinky program provided by Zephyr using the below commands. After executing it, if you see a blinking LED on the board you have installed Zephyr successfully! You can now continue with Configuring Building and Flashing.
west build -p always -b stm32f4_disco zephyr/samples/basic/blinky
west flash -r openocd
For Windows or macOS users:
-
You need to follow the Getting Started with Zephyr guide.
- Do not forget to change
<your-board-name>withstm32f4_discoin the Build the Blinky Sample section.
- Do not forget to change
-
Once you have the board, you can proceed with the last step of the guide, to Flash the Sample. You should see a blinking LED on the board.
- In order to flash the application, you might need to install a couple of dependencies. If needed:
- for Windows, you can download OpenOCD's pre-built files here, extract it and move it to your desired program location. Then, add it to your system environment's path, you can find here a tutorial on how to update your PATH.
- When you have OpenOCD installed and you get an error related to
libusb_open()not working, you can try installingSTLinkUSB drivers instead. You can find the download page here - for macOS, use the command
brew install open-ocd.
- You might also need
elftools, used to parse ELF files. In such a case, you can execute this command:pip install pyelftools.
- In order to flash the application, you might need to install a couple of dependencies. If needed:
-
If you see a blinking LED on the board you have installed Zephyr successfully! You can now continue with Configuring Building and Flashing
Configuring Building and Flashing
Once you have successfully installed the toolchain on either Linux or Windows and have tested the setup with the sample program, you will configure west, which is Zephyr's multi-purpose tool which we will use for building and flashing the assignments.
Follow the next steps:
-
Clone your assignment's repository.
-
Next, execute the following command in your Zephyr installation directory:
west build -p always -b stm32f4_disco <<<path/to/assignment>>>
If building fails, we suggest you take a look at some of the tips in the troubleshooting guide.
- After the previous command you can build your assignment source code using
west buildand upload/flash/burn your assignment to the board by runningwest flash -r openocd.
IMPORTANT
- You have to run these commands in your Zephyr installation directory and not your assignment directory! .
- Remember that each time you want to use
westyou have to activate the virtual environment by executing in your Zephyr installation directory the commandsource ./.venv/bin/activatefor Linux. For Windows, it depends on the shell you are using, refer to the Zephyr documentation.
The process of building and flashing is considerably easier when using an IDE. To know more about how to set up your IDE for the assignments, take a look at editor setup. However, before you setup your IDE, ensure that you have installed a serial monitor, check this section for details on how to install a serial monitor and connect to the board console.
Using a Debugger
Zephyr allows for debugging in gdb. The development board includes an onboard debugger. After building the project, you can debug by typing west debug and a gdb prompt should appear. Be aware that you will need to debug with the command line.
When answering questions for the assignment, be sure to run your code using
west flashrather thanwest debug.
Next to gdb you can debug via the console in both assignments. This requires a serial connection from your computer to the micro-USB port on the development board. As opposed to directly debugging with gdb, you have to connect the computer to an additional USB port located on the board.
Connecting to the board console
Physical connections
You should have a spare USB-A to USB-micro. You use this cable to communicate with the microcontroller by connecting it to the bottom connector of the development board. You should end up with something similar to the image below:
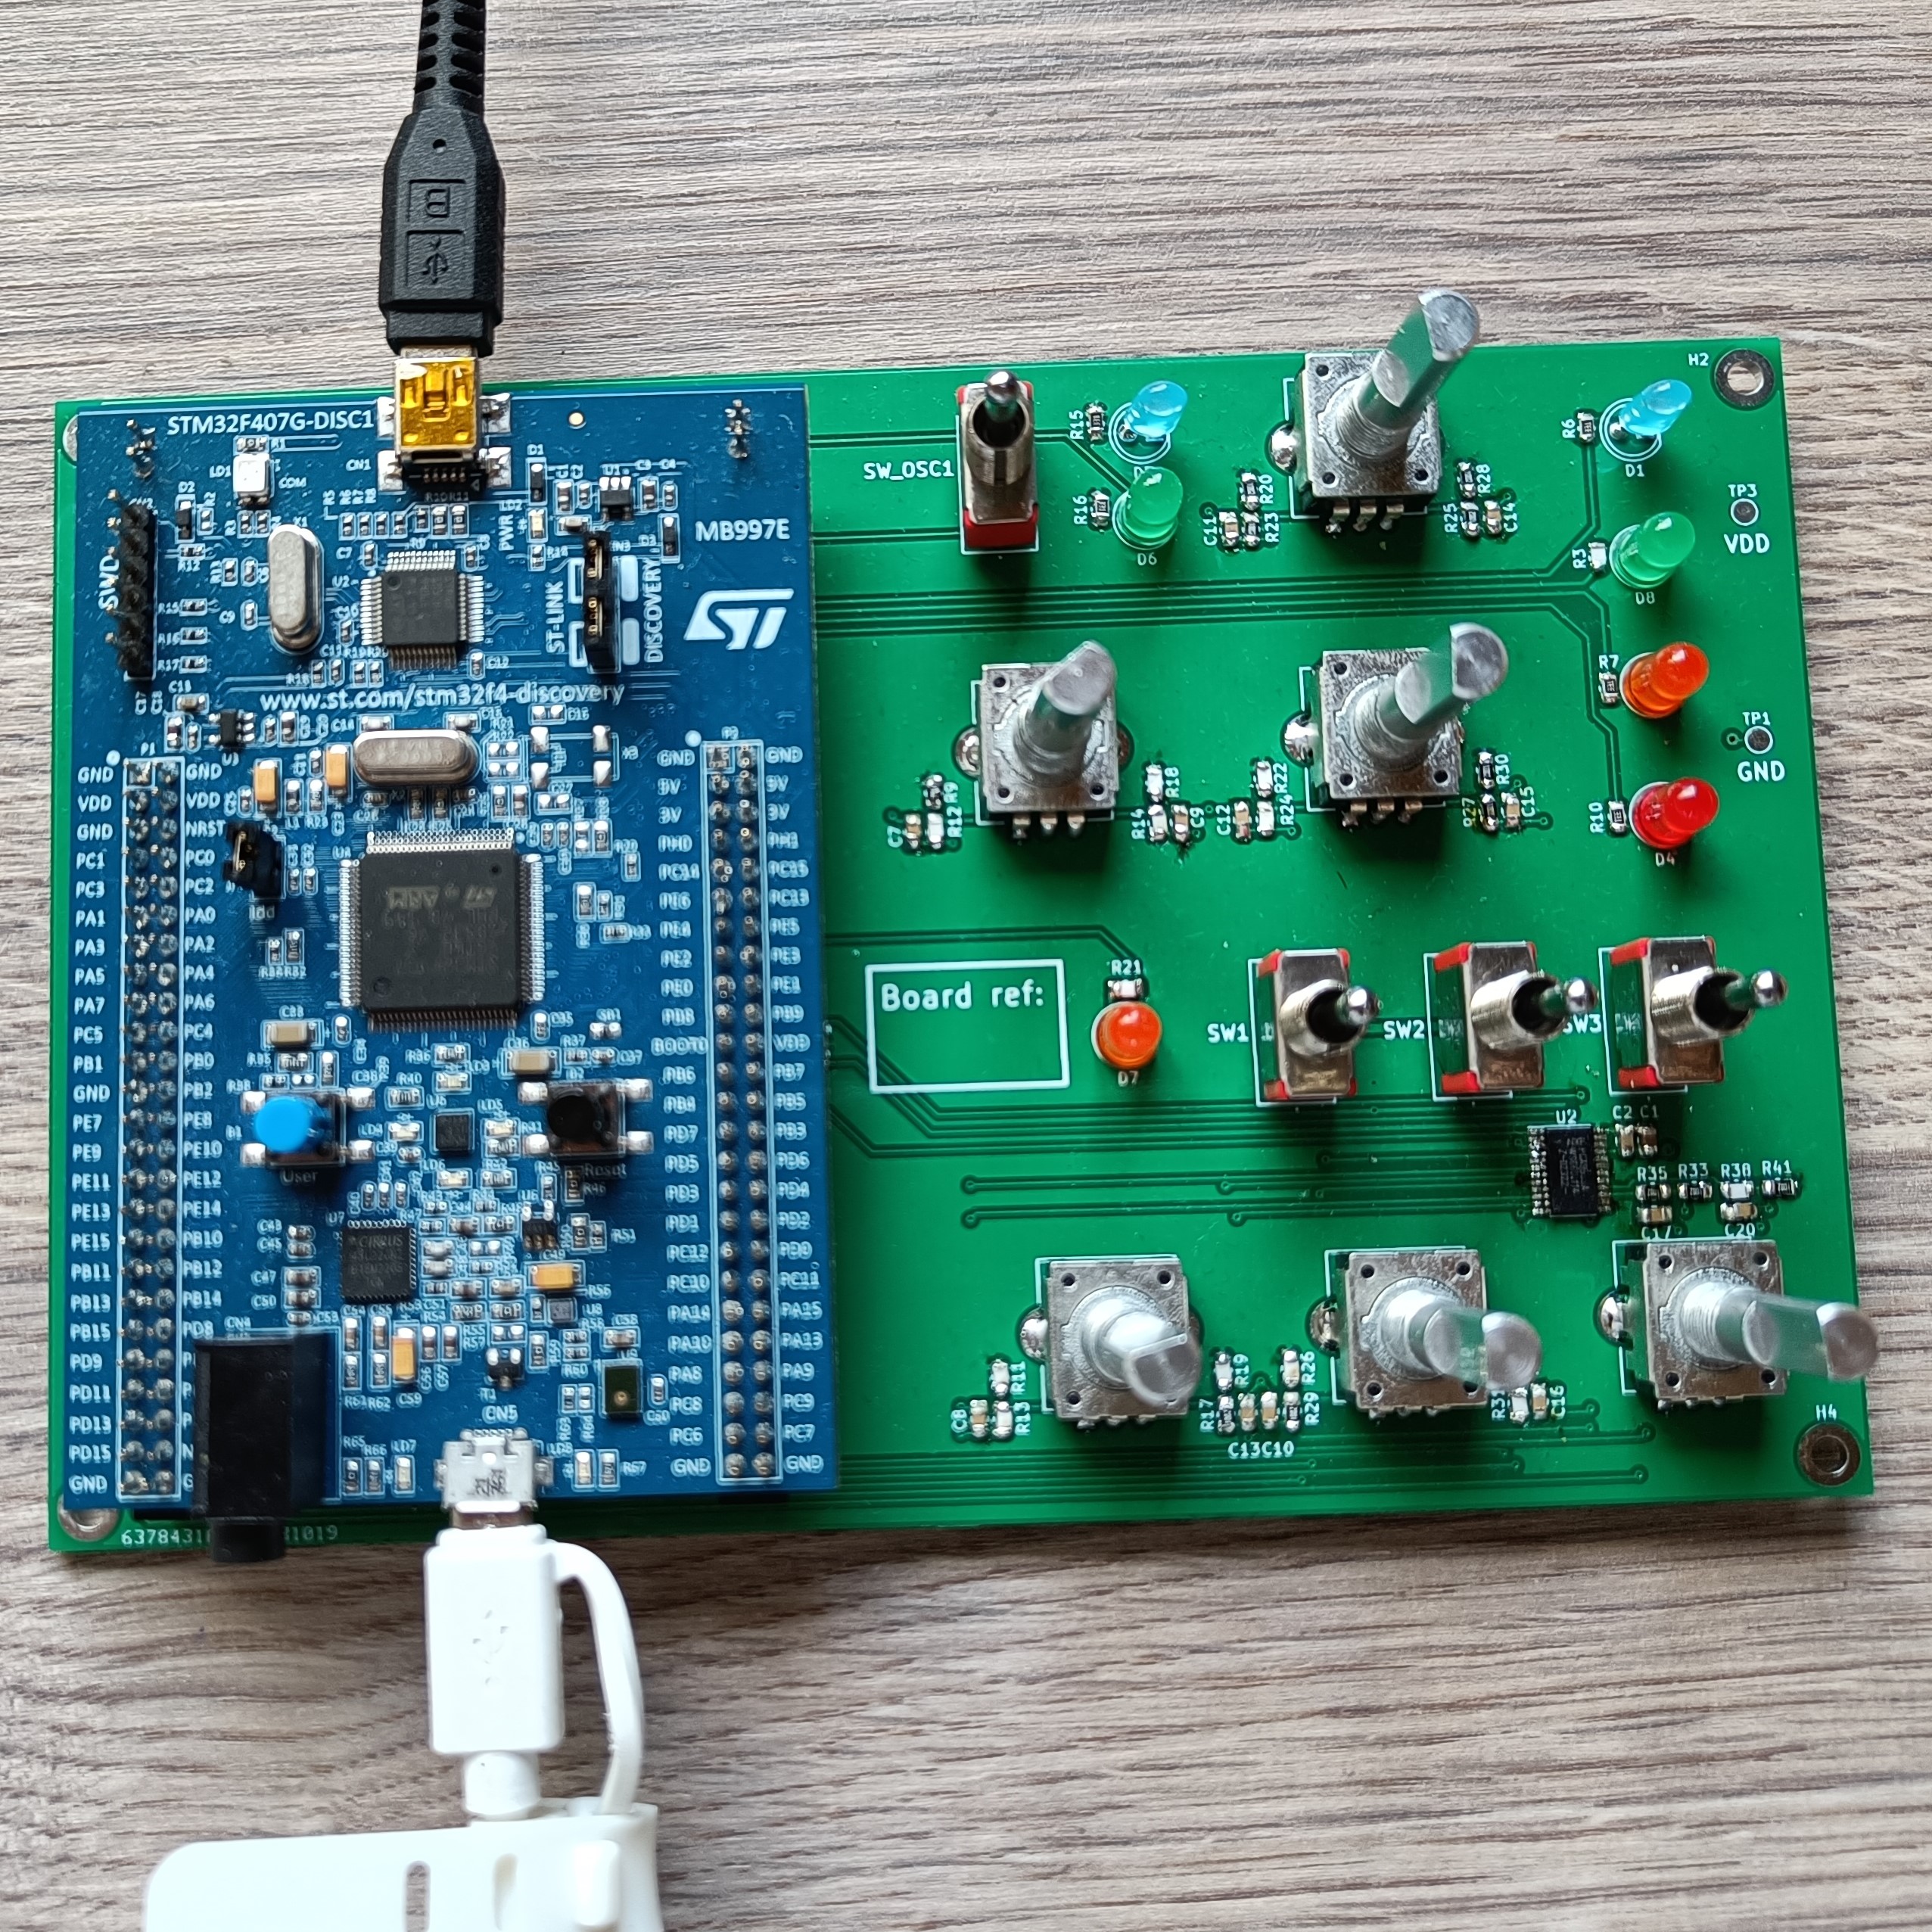 Figure 6: Assignment B setup
Serial Monitor
You also need to install a serial monitor. If you are using Linux, you can install screen, minicom or picocom. All of them are command line based. If it is the first time you are connecting to a serial port, you might have to add yourself to the dialout group. You can do it by executing the following command:
sudo adduser <<<user>>> dialout
If you are using Windows, you cannot use the aforementioned applications. VS Code has an extension from Microsoft, Serial Monitor, that we strongly recommend, even for Linux users, and Arduino has also a serial monitor that you might be familiar with. There are standalone applications like Serial Lab that can also do the job.
After you have cloned Assignment A repo, open main.c and uncomment the macro CONSOLE_ENABLED. Then build and flash the code to the board. Remember that if it is the first time building the project, you have to execute the whole build command, otherwise, you can just execute west flash to compile and build, or west build to just build.
Then, a new serial port should appear in your computer's list of devices, Device Manager for Windows and /dev for Linux. You can then connect to the board with the default baudrate, 115200. Soon after, you should see "Initialization finished!" pop up on your screen.