Synthesizing, loading and running the design
You don't need to do this step if you are only simulating the baseline
Only do this once you have successfully simulated the LWI instruction
Similar to Lab 1, you will Generate Bitstream using Vivado. But you will use Vitis Classic to program the bitstream not the Hardware Manager. In this project, you want to flash the bitstream and the code for the ZYNQ ARM Core, not only the bitstream we use the Vitis Classic.
Generating Bitstream and Exporting Hardware
Once your simulation is working with the new instruction. You can navigate to Flow Manager -> Generate Bitstream to generate the bitstream.
When the bitstream generation is completed, you need to export the hardware. To do this, select File → Export → Export Hardware..., click Next, select Include Bitstream option, and finish. This will export your *.xsa file, which is required for the Vitis project.
Setting up a Vitis Classic Project
Only need to do this step the first time launching Vitis Classic
Follow the steps to setup the Vitis Classic project required for this lab:
- Open Vitis Classic, select the
workspacefolder in project directory as the working directory - Select
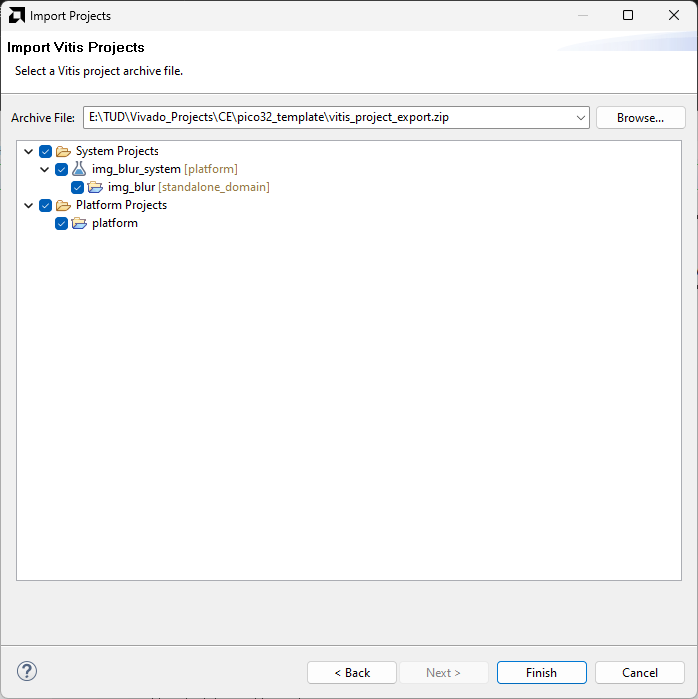
File → Import... → Vitis project exported zip file - Browse and locate,
vitis_project_export.zipin the project files - Select Both system projects and platform projects and import
Flashing and Executing the Program
Once you have successfully generated and exported a bitstream and exported it using the Vivado tool, you can upload the new bitstream.
Follow the steps to program your FPGA:
- The hardware needs to be updated: Right-click on the
platformand selectUpdate Hardware Specification. Select the exported*.xsafile. - Once the platform is updated, Right Click on the
img_blurproject andBuild Project, and wait till the build is finished - Right Click
img_blur_systemand click onProgram Deviceand selectProgram - Launch a Serial Monitor and open the COM port with Baud rate 115,200.
- Right Click
img_blur_systemand click onRun As → 1 Launch Hardware
You should see the output from the FPGA on the serial monitor. Your output should be similar to the one shown below:
Successfully init
Starting Baseline ISA Test
Programming done
Program Completed with XXXXXX cycles
Image has been blurred correctly

Reseting the BRAMs

Starting Modified ISA Test
Programming done
Program Completed with XXXXXX cycles
Image has been blurred correctly
Note down the number of cycles taken by the Baseline ISA Test and the Modified ISA Test. You will need this to answer the questions.